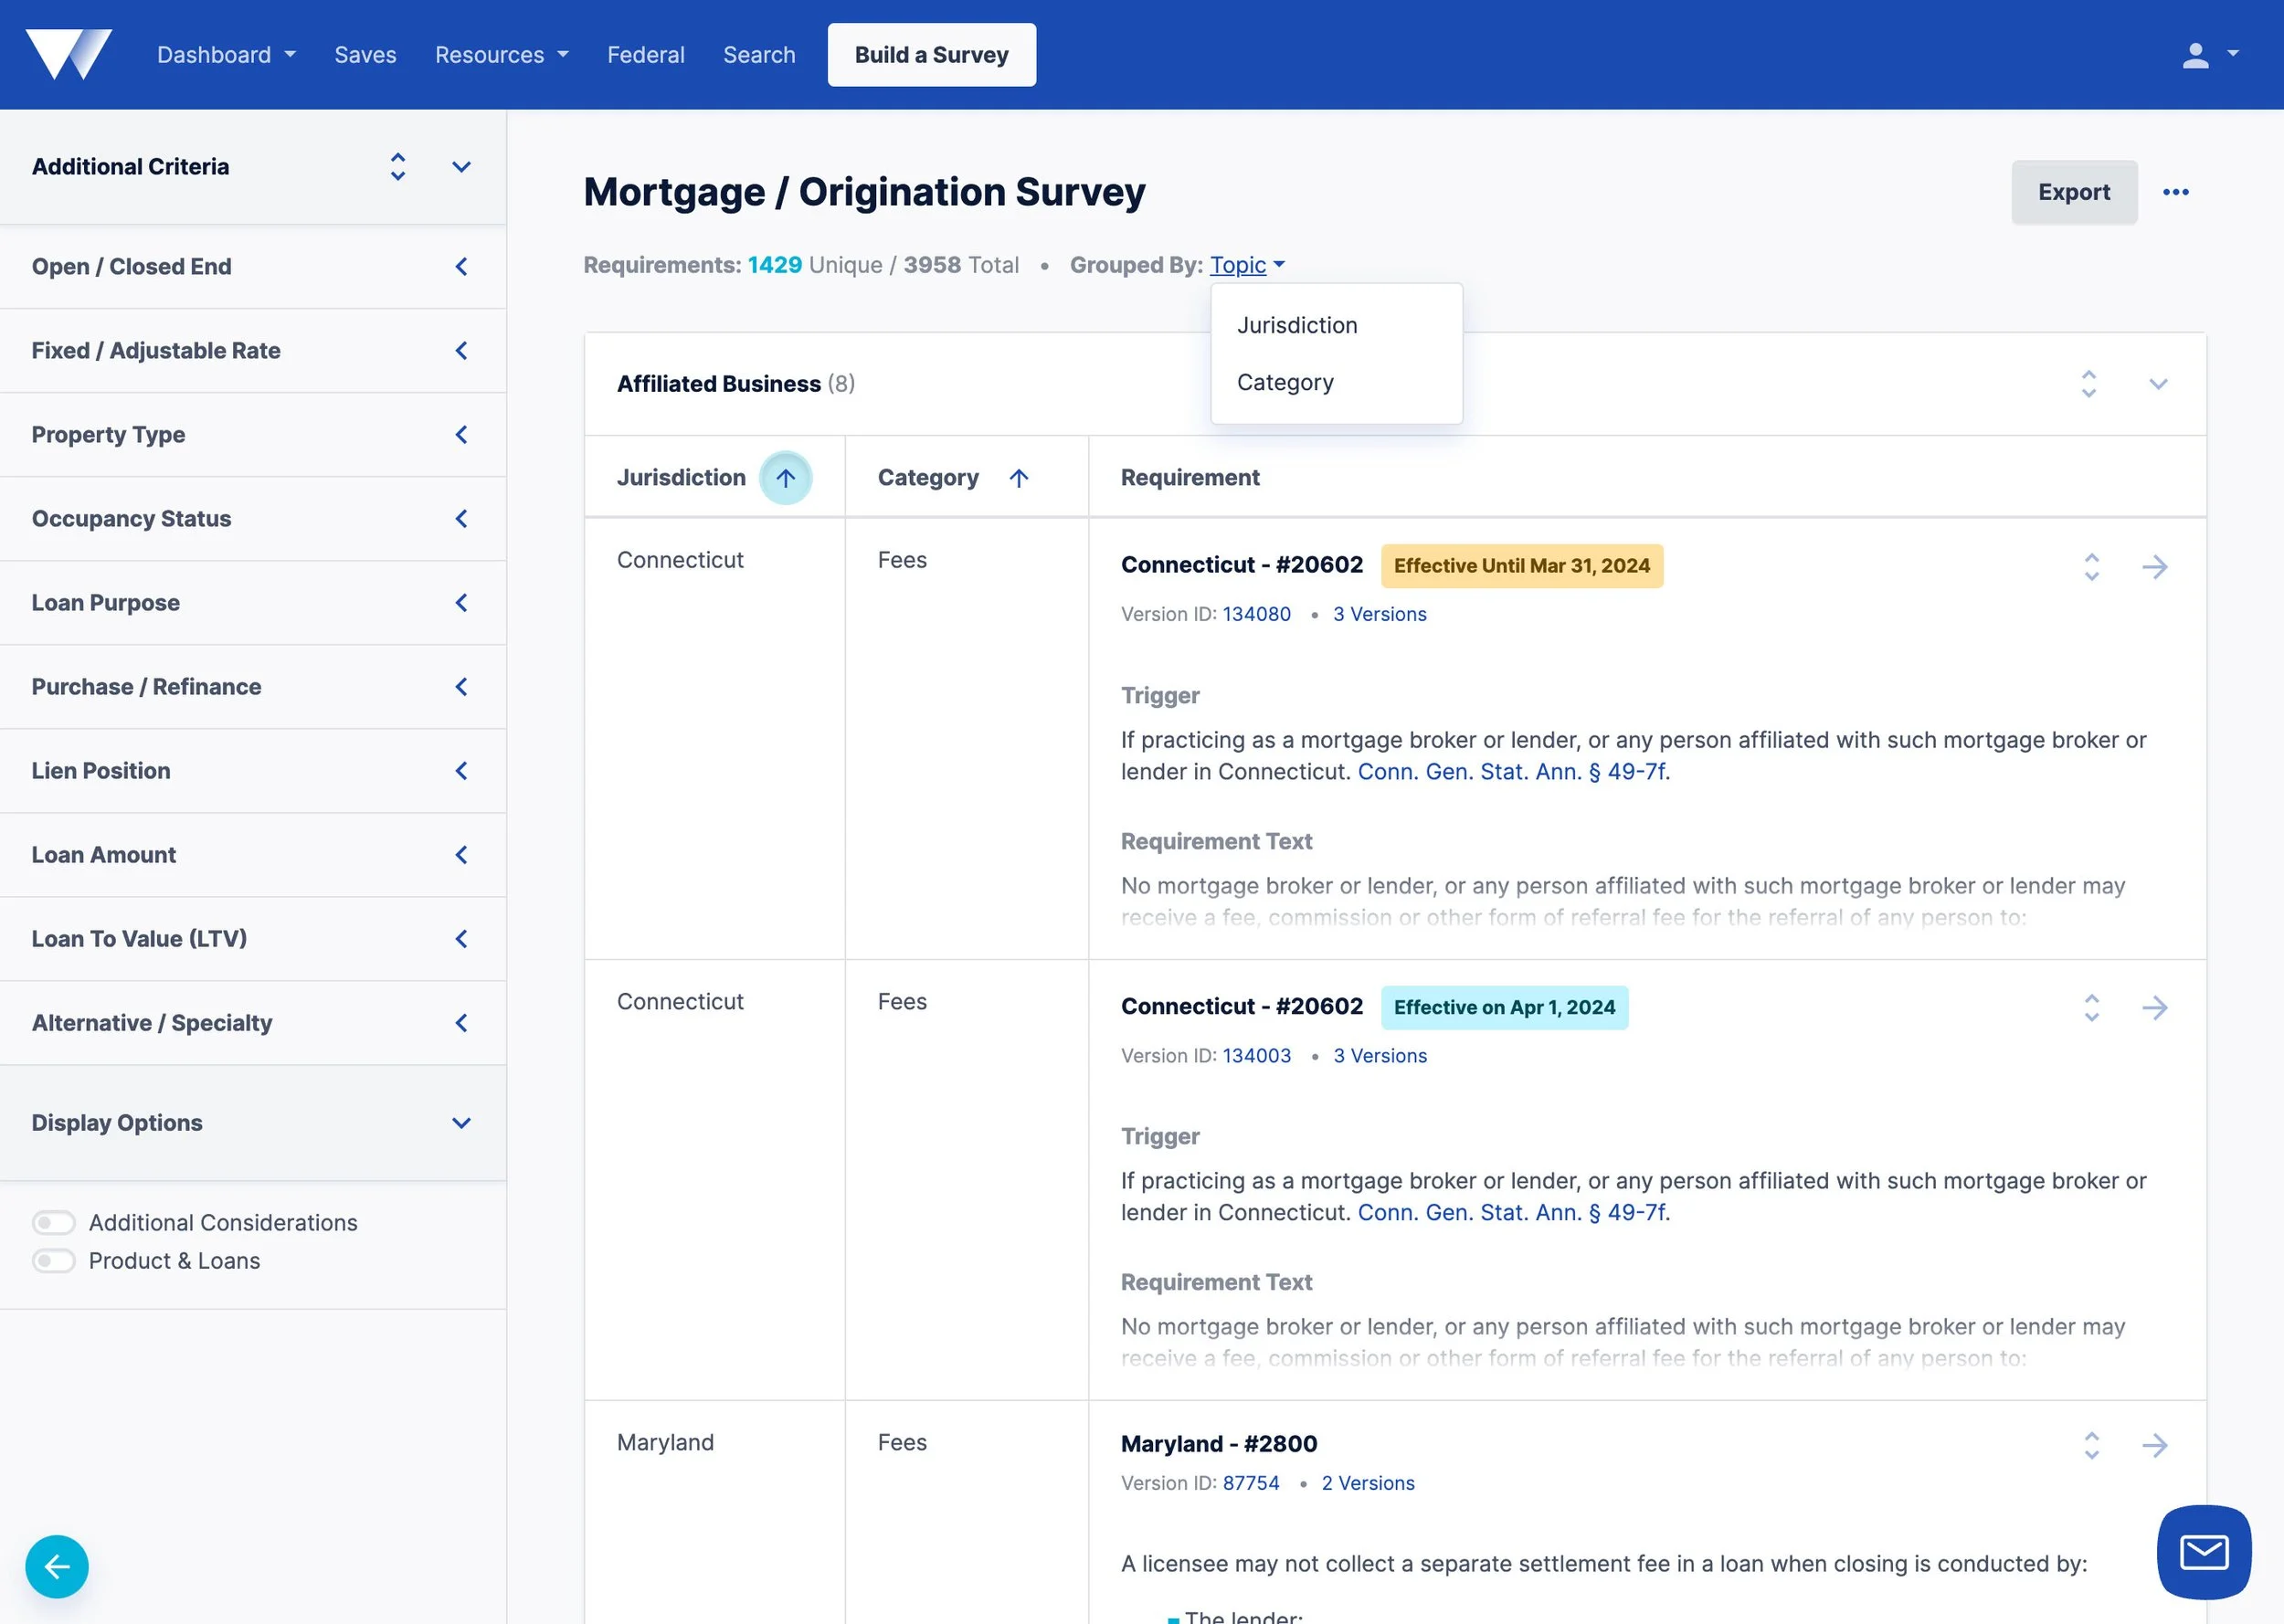
Navigating Survey Results – Table Layout
Winnow offers different options for viewing survey results. Our original Table Layout organized results into manageable groups based on jurisdiction, topic, or category.
We recently introduced a new List Layout that you can access from the Options menu on your survey results page, which introduces a streamlined view that simplifies formatting, adds powerful filtering options, and eliminates the appearance of duplicate requirements.
Survey Header
Name
Winnow gives your survey a default name based on the product type and loan phase you chose when building it. To change this, click the Save button to name and save the survey. You can change the name by clicking Rename from the Options menu.
Total / Unique Requirements
Under the survey name is the total number of unique requirements on your survey. If you’re using the Table Layout, there are values for the unique and total number of requirements. Depending on how your results are grouped, duplicate requirements may appear, as this layout groups results into different buckets. The unique count shows the number of non-duplicated requirements. The total count includes duplicates.
Grouped By
You can group your results by Topic, Jurisdiction, or Category (Table Layout only). Changing this value may result in fewer total records shown. The default grouped by value is Topic.
The order by selection determines whether your results are ordered alphabetically by Jurisdiction or Topic. Winnow uses the first alphabetical topic to sort when there are multiple applicable topics on a requirement. When using Table Layout, you may also group by category.
Survey Options
Save
Saving your survey is recommended and offers a few additional benefits.
Naming your survey makes it easier to identify
Saved surveys appear in the Saves section of Winnow, accessible from the main navigation
You can duplicate a saved survey and create quick variations
Saved surveys generate weekly notifications to monitor regulatory changes
Read more about saving your results here.
Update
Once you save a survey, adding Additional Criteria or changing the Order By value will trigger an Update button. Click this to update your saved survey and apply these values the next time you view the survey. You can also click the dropdown arrow next to the update option to Revert Changes or Save as New, which allows you to name and save a new survey with your changes applied.
Export
Export your survey as either a PDF or Word document.
Options Menu (…)
Edit: Returns you to the Build Survey form to make changes
Rename: Change your saved survey name
Duplicate: Copy your current survey
Delete: Permanently delete your saved survey
Layout Section: Apply your desired survey layout and set a default layout
View Details: Shows all the criteria and topics that make up your survey
Show Hints: Show the walkthrough tour again
Sidebar
Additional Criteria
Additional Criteria are selections you can apply to a survey to further narrow your results, and selections are saved to your survey when you click the Update button.
Display Options
Show or hide your survey results' Additional Considerations and Product & Loan Details sections.
Survey Results
Each survey contains a list of applicable requirements matching the criteria you selected for building your survey. Results are ordered alphabetically by Jurisdiction, Topic, or Category (Table Layout only). You can change this value from the Grouped By menu in the survey header.
Each requirement row has three columns. The first two can be either jurisdiction, topic, or category, depending on your grouping. The third column contains a title link made up of the jurisdiction name and a unique ID. Clicking the link takes you to the detail page containing more information about that requirement. If a requirement also has multiple versions or attachments, you'll see that information directly under the title.
After the title section, each requirement row can contain the following sections:
Trigger: The conditions that trigger the requirement
Requirement Text: The main body of the requirement
Timing: How long you have to take action
Additional Considerations: Other information relevant to the requirement
Defined Terms: Links to each term used in the requirement text


